.svg)

Learn how to build and install an IPA file on your iPhone, step by step. This guide covers certificate creation, IPA generation, and multiple installation methods, making it easy to test or distribute your iOS apps outside the App Store.
Introduction
An .ipa file is the packaged format of an iOS app. It’s used for testing, internal distribution, or releasing apps outside of the App Store. In this guide, we’ll cover how to create an IPA file and install it on your iPhone step by step.
Prerequisites
- An Apple Developer Account (individual or team).
- A Mac with Xcode installed.
- An iPhone or iPad for testing.
- Access to the required certificates and provisioning profiles.
Certificate Creation
To run an app on iOS devices outside the App Store, your app must be digitally signed. Apple requires certificates and provisioning profiles to sign your app. You will need to:
Create an App ID
- Log in to Apple Developer Portal
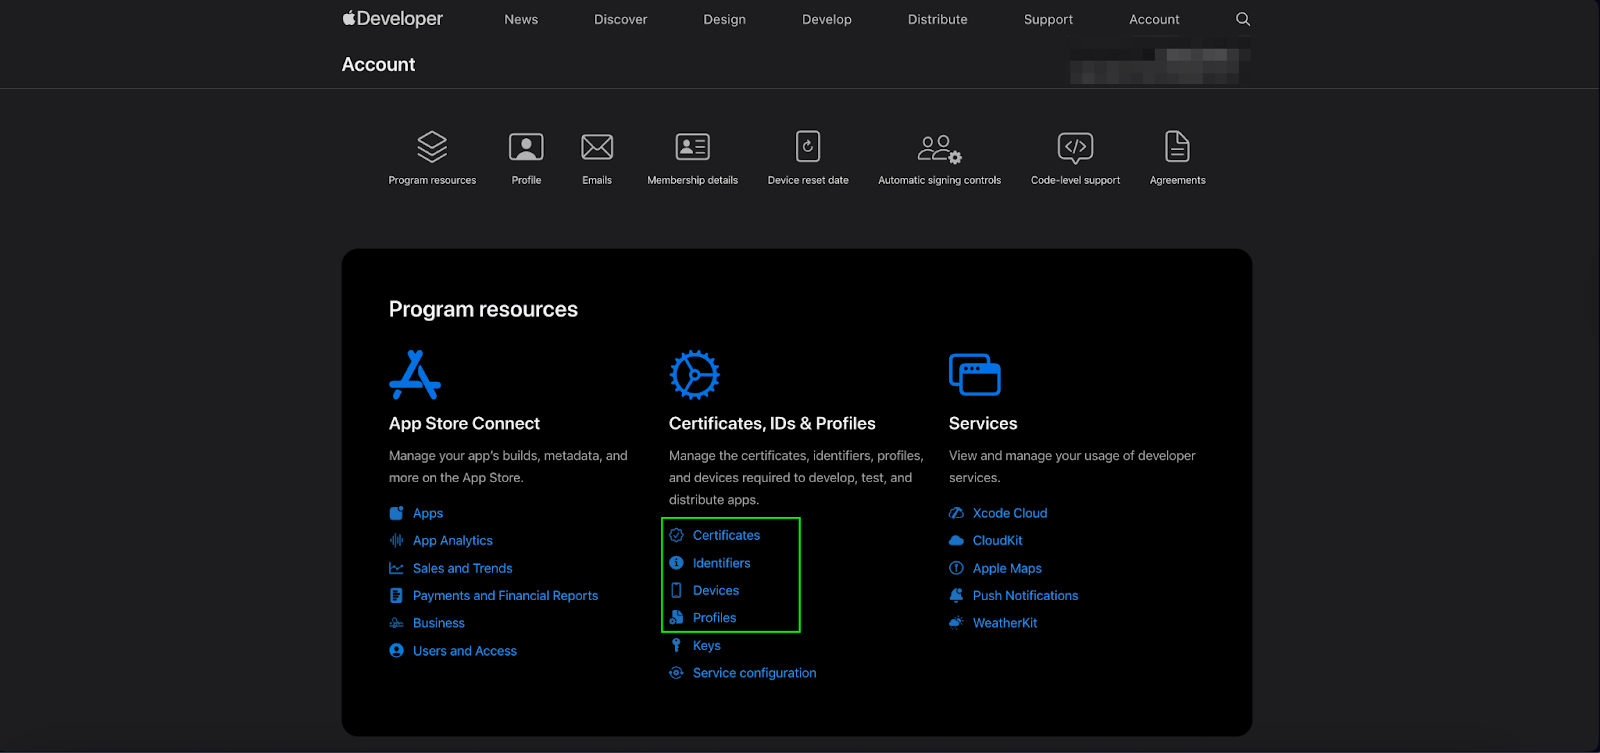
- Navigate to Certificates, IDs & Profiles → Identifiers → App IDs → +.
- Enter a Bundle ID that matches your Xcode project.
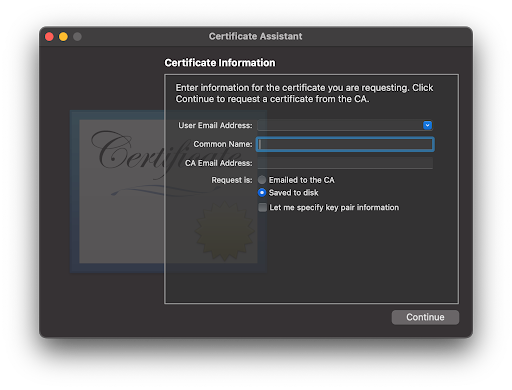
Generate a Certificate Signing Request (CSR)
- Open Keychain Access on your Mac.
- Go to Certificate Assistant → Request a Certificate from a Certificate Authority.
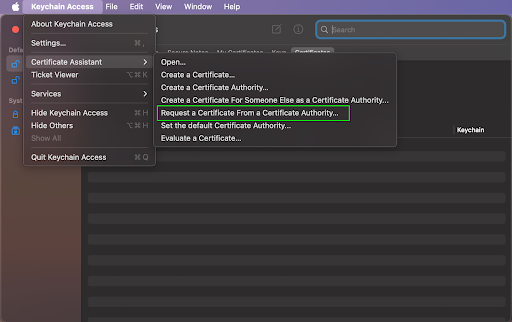
- Save the CSR to your local machine.
Upload CSR & download certificates
Choose the certificate type:
- Development Certificate – For testing apps on your registered devices.
- Distribution Certificate – For distributing apps via the App Store, TestFlight, or Ad-Hoc.
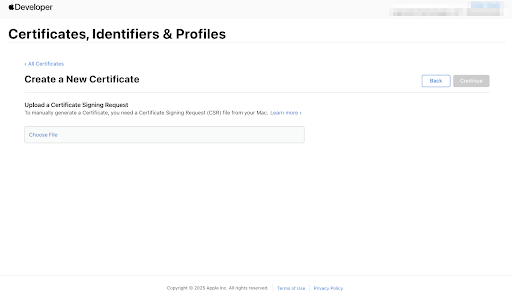
- Upload your CSR (Certificate Signing Request).
- Download the generated .cer file.
- Double-click the .cer file to install it in Keychain Access.
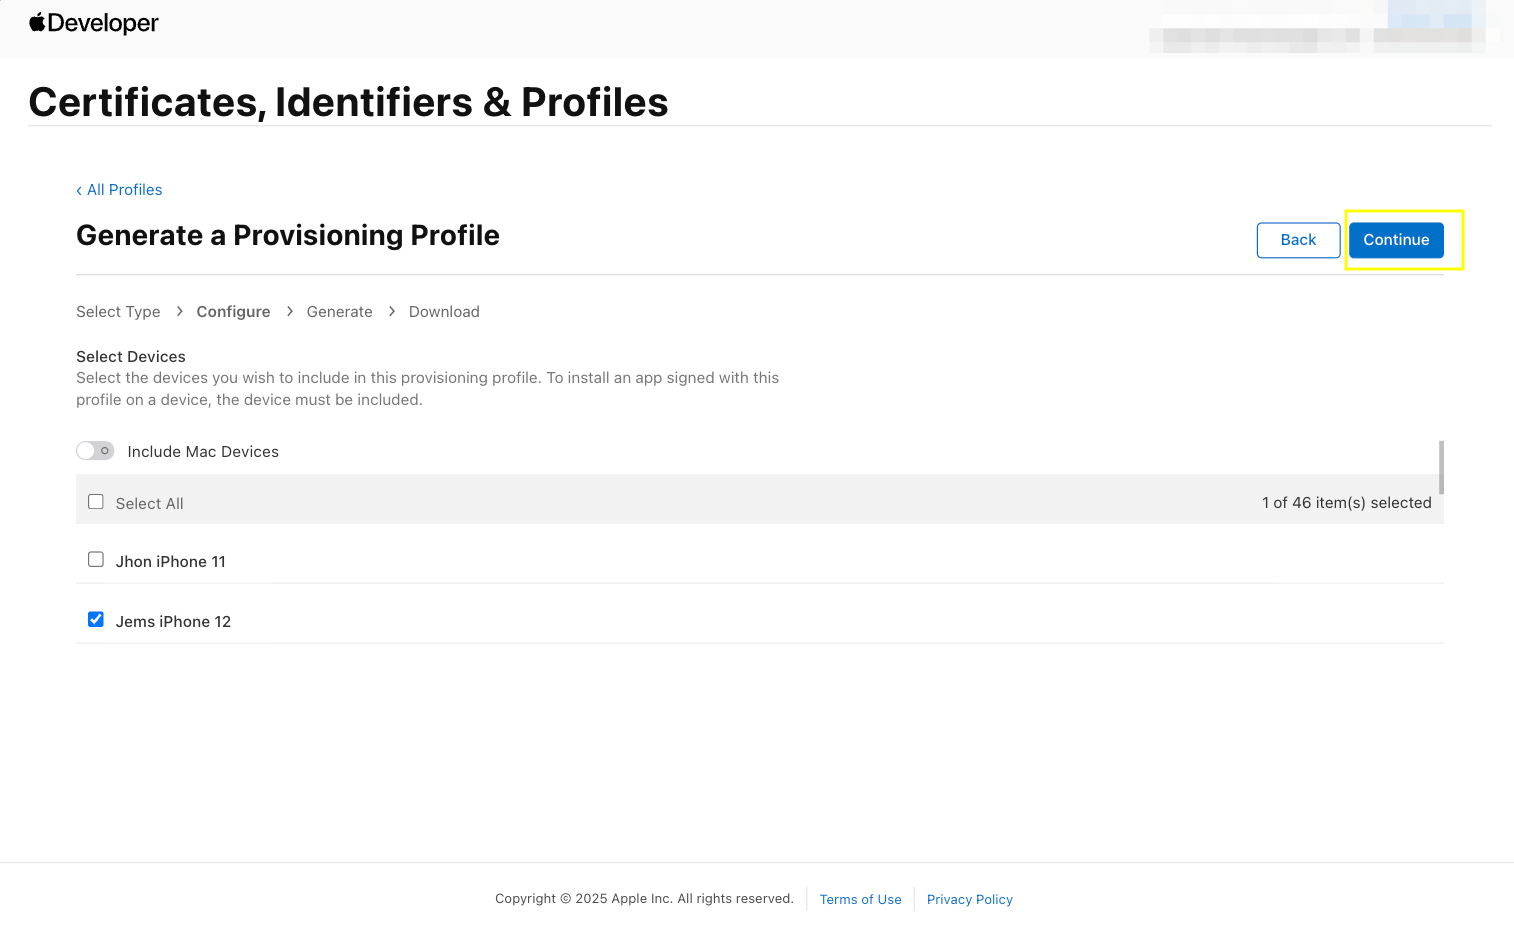
Register Devices (for Ad Hoc / Development builds)
- To find your device UDID, please refer to this AppsOnAir Get UDID documentation link.
- Go to Devices → + in Apple Developer Portal.
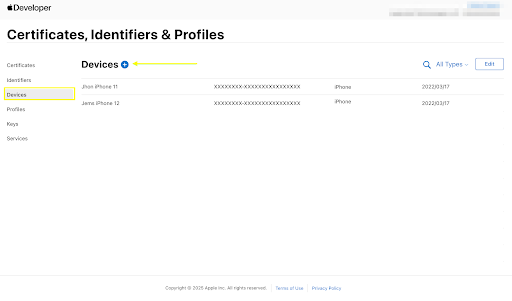
- Add your iPhone UDIDs (unique device identifiers) to allow installation.
- You can register multiple devices with a single file.
- You can register only 100 device UDIDs.
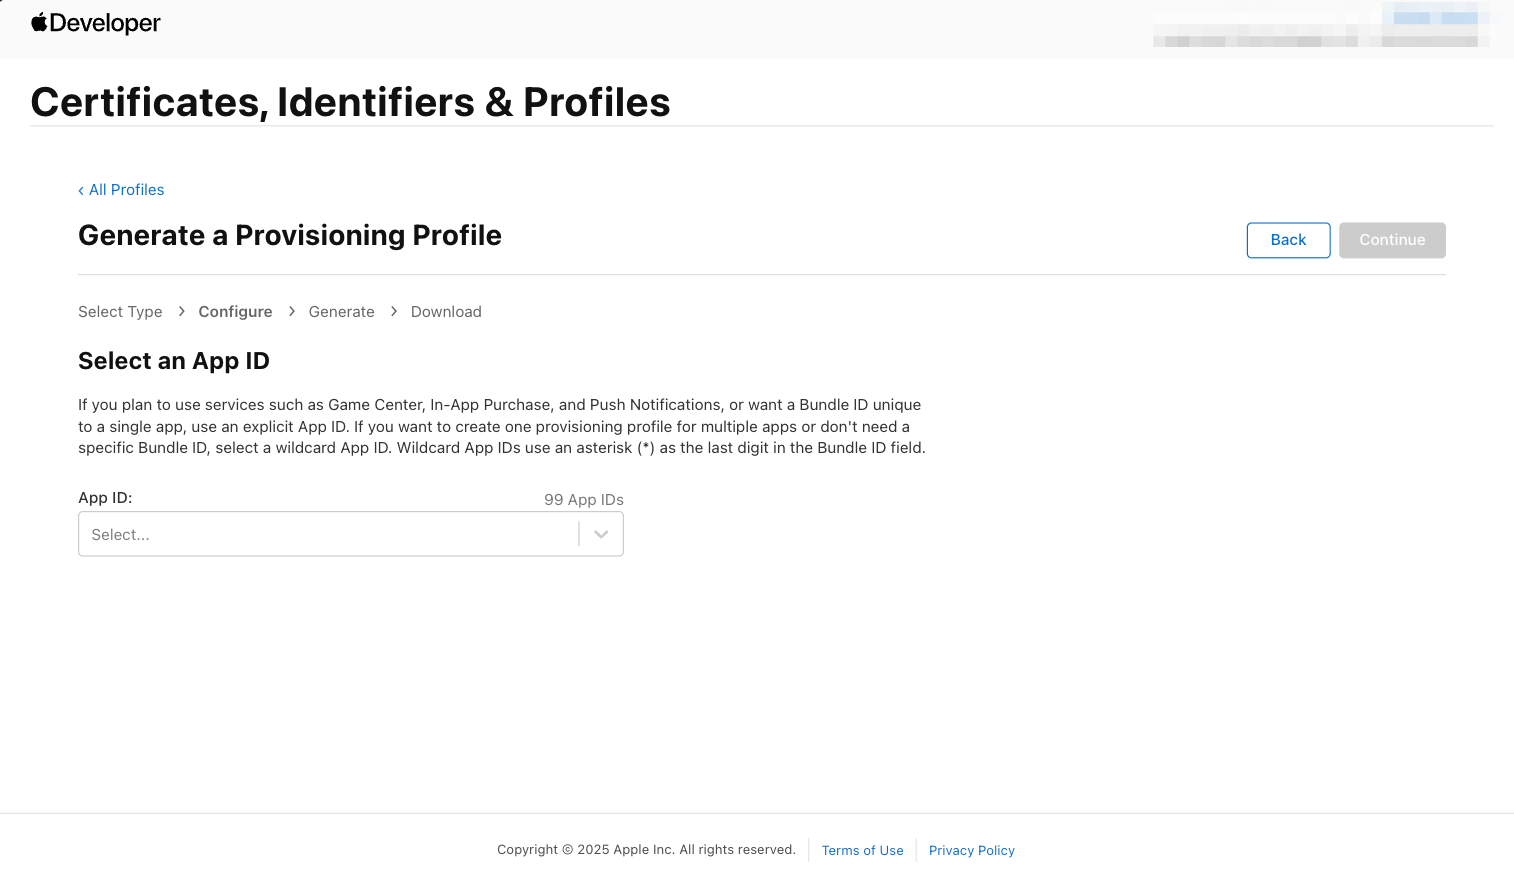
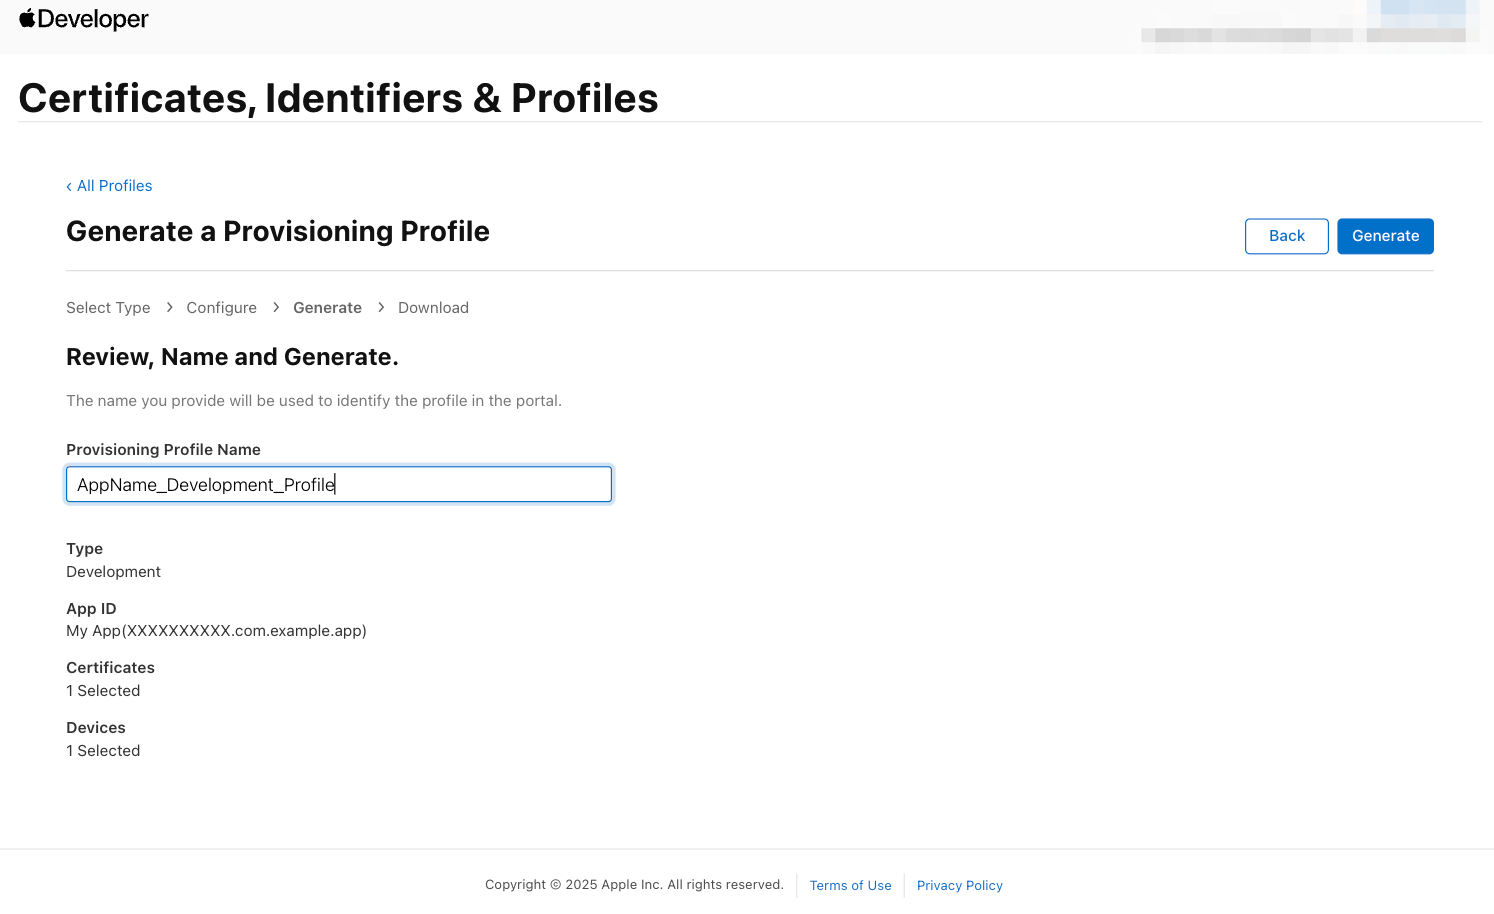
Create Provisioning Profiles
- Go to Profiles → + in Apple Developer Portal.
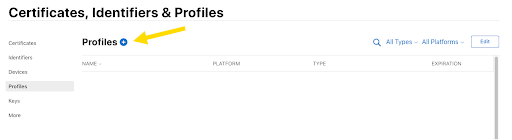
- Select the profile type: Development or Distribution.
- Development Certificate – For testing apps on your registered devices.
- Distribution Certificate – For distributing apps via the App Store, TestFlight, or Ad-Hoc.
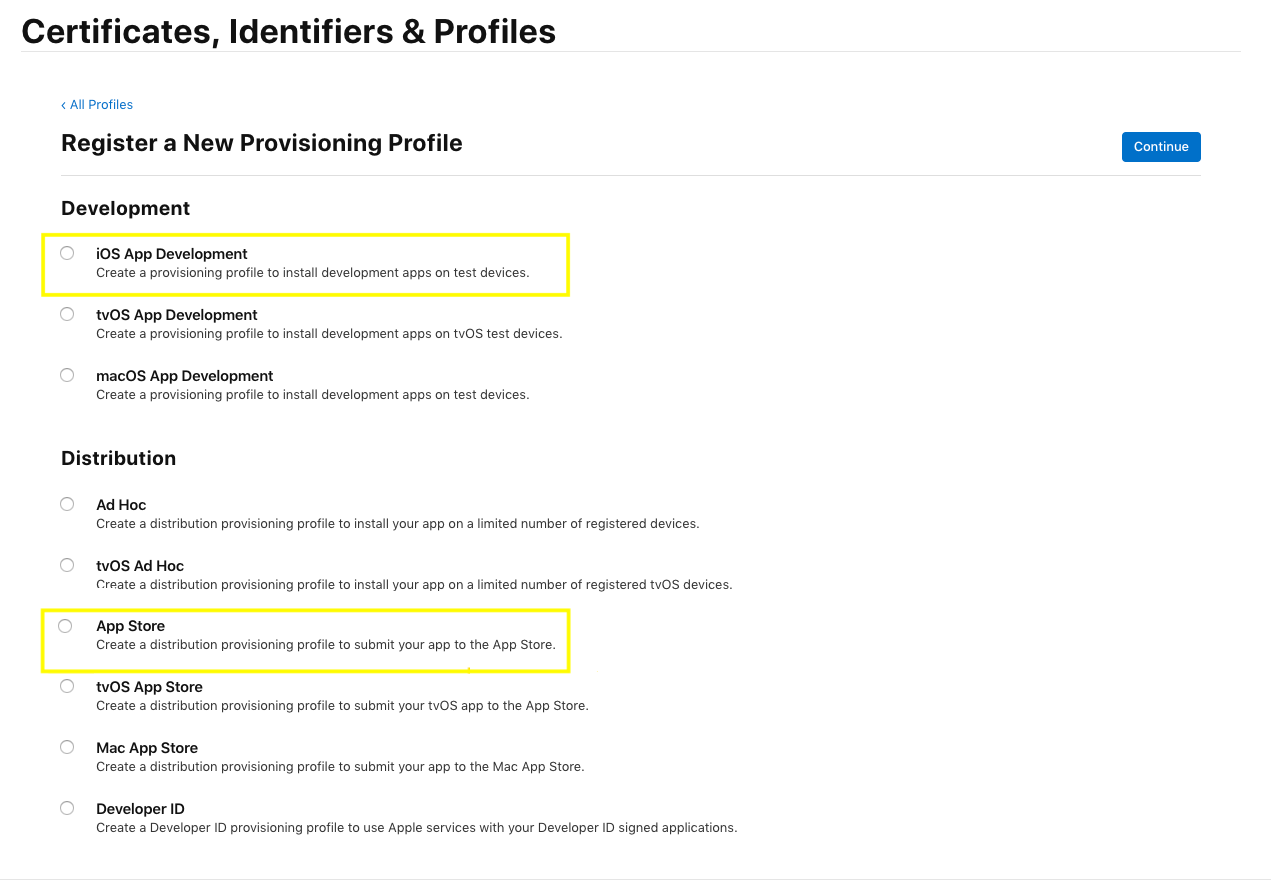
- Link it with your App ID and certificate.
- Add devices (for Development/Ad Hoc).
- Download the .mobileprovision file and install it in Xcode.
⚠️ Note: For Ad Hoc or internal distribution, your device’s UDID must be registered in the provisioning profile.
Create IPA
- Once certificates and profiles are ready, you can generate the IPA file.
- Open your project in Xcode.
- Select your target device to “Any iOS Device”.
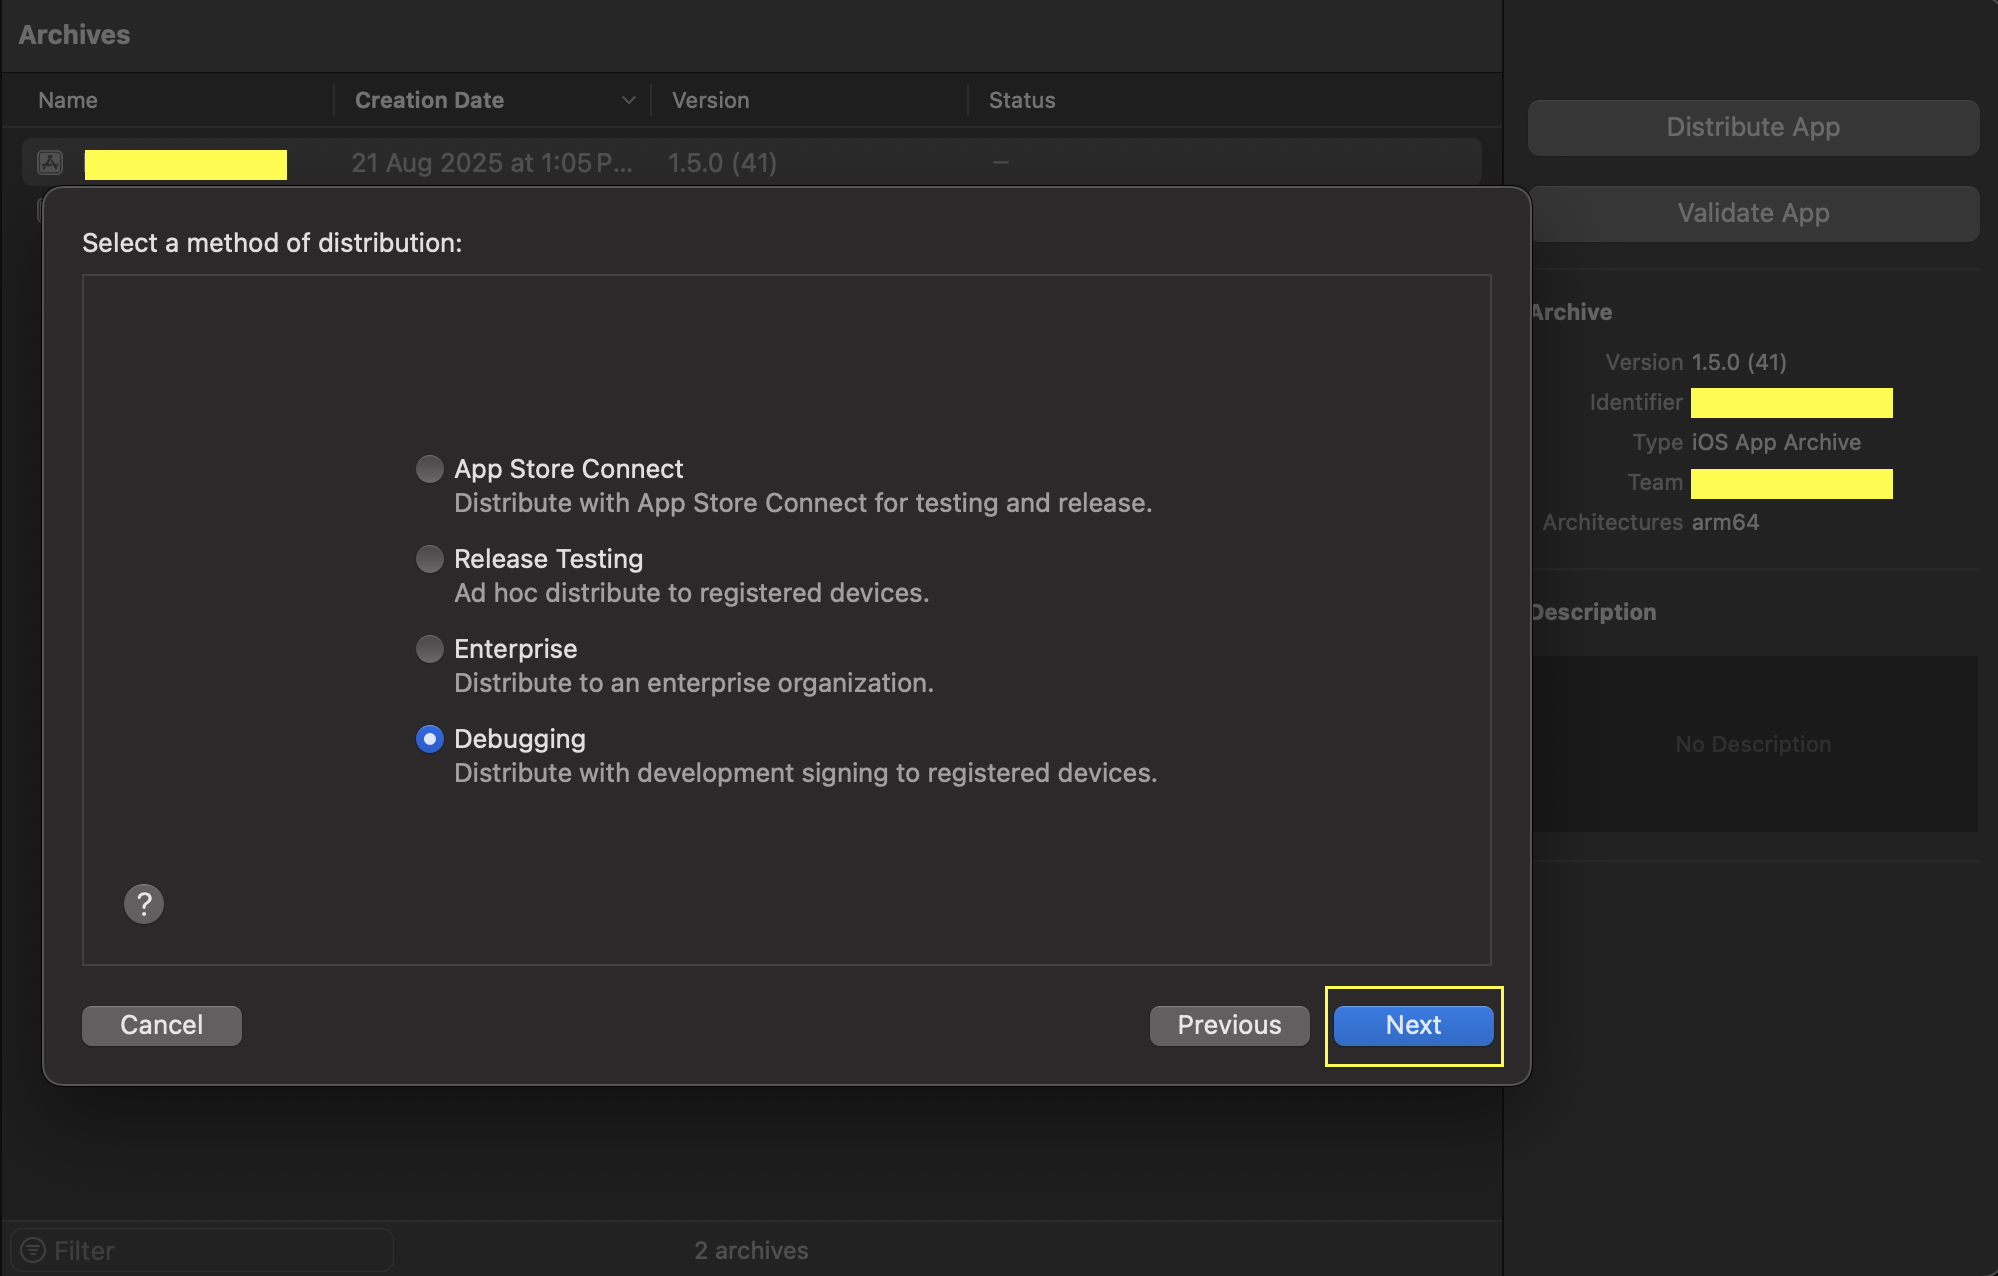
- In Xcode, archive your app via Product → Archive.
- Once the archive is complete, open the Organizer window.
- Click Distribute App → Development / Ad Hoc / App Store.
Use the Organizer to Export IPA for Development, Ad Hoc, or App Store.
Notes
- Development IPA → For internal testing on registered devices.
- Ad Hoc IPA → For distributing to specific testers (devices must be registered).
- App Store IPA → For uploading to TestFlight or App Store.
Installing the IPA.
There are multiple ways to install an IPA on your iPhone:
AppsOnAir
- Recommended for beta testing.
- Signup / SignIn on AppsOnAir Portal
- Export build from Xcode
Choose / Create App → Upload the IPA to the AppsOnAir platform.
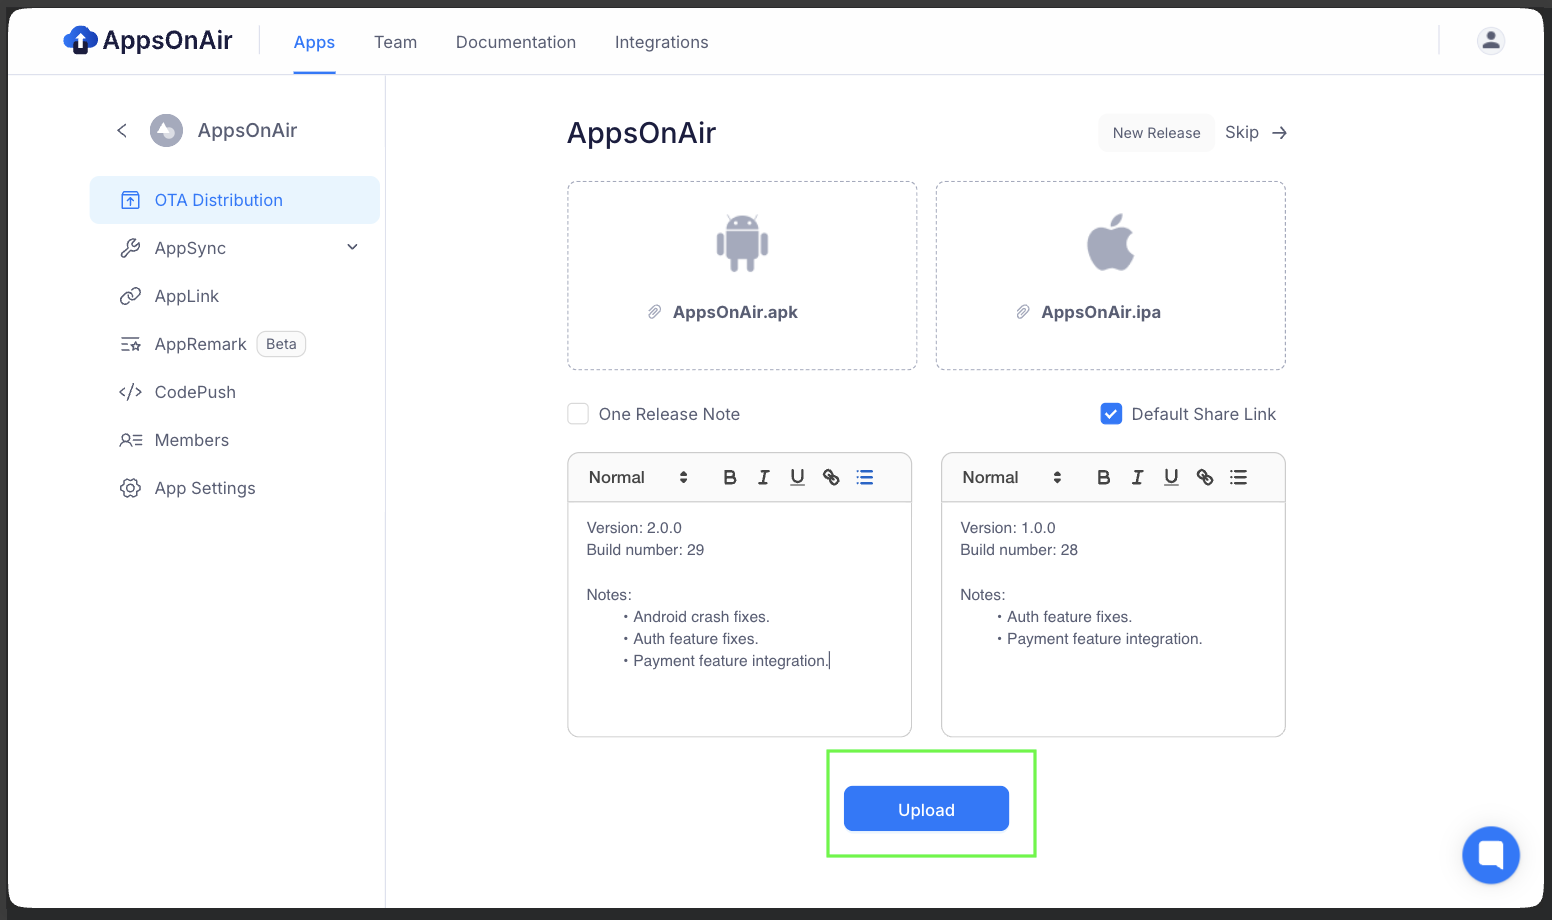
Share the installation link with your testers.
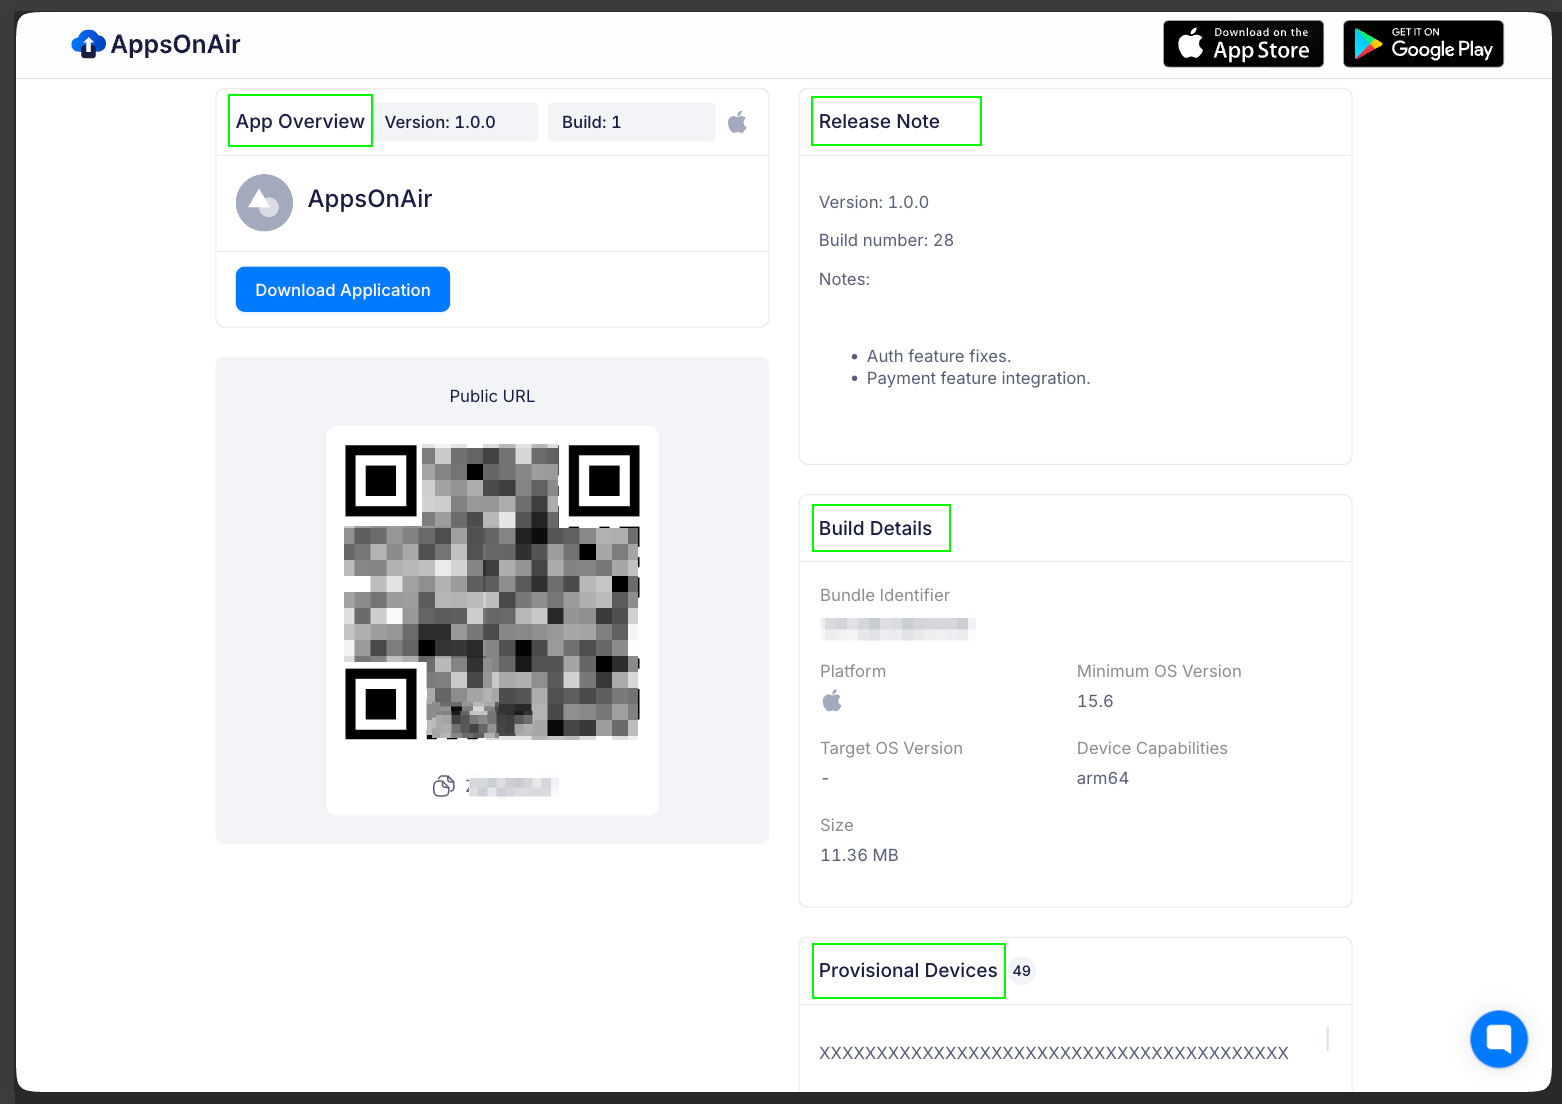
Open the link in Safari on the iPhone → Tap Install.
For more details, please refer to the AppsOnAir OTA distribution documentation.
You can also use AppsOnAir mobile application on Play Store and App Store.
You can also checkout this mobile and web app quick start documentation.
Note:To install the IPA, kindly open the link in Safari. If opened elsewhere, it will only download.
Key Benefits:
- Cross-Platform Distribution: Deploy both Android (.apk) and iOS (.ipa) builds from a single platform
- Secure Shareable Links: Generate password-protected links for controlled access to builds
- Team Collaboration: Manage multiple workspaces with role-based access for developers, testers, and stakeholders
- Build Expiration: You can set the validity to 7 days, 1 month, or as long as 3 months.
Perfect for:
- Enterprise Teams: Internal app distribution without app store dependencies
- Cross-Platform Projects: Managing both iOS and Android builds in one place
- Rapid Iteration: Frequent updates and quick feedback cycles
- Client Demos: Secure, professional app sharing with external stakeholders
- Global Teams: Remote collaboration with instant build access
- Agencies: Managing multiple client projects with separate workspaces
TestFlight
Recommended for UAT testing and distribution.
TestFlight is Apple’s official platform for testing iOS apps. Recommended for UAT and beta distribution as it allows easy app sharing, real device testing, crash/feedback collection, and seamless updates.
App Store Connect Setup
- Sign in to App Store Connect
- Select your app → TestFlight tab
Upload Build
- Upload IPA via Xcode
- Wait for processing completion
Create Test Group
- Add Internal/External testers
- Set up test information and review notes
Share with Testers
- Send invitation emails to testers
- Testers receive email with TestFlight link
Installation Process
- Testers install TestFlight app from App Store
- Open invitation link → Accept → Install app
Key Benefits:
- Real Device Testing: Test on actual iOS devices across different versions and hardware configurations
- Built-in Feedback: Collect crash reports, screenshots, and detailed feedback directly within the TestFlight app
- Version Management: Manage multiple build versions and control which testers receive specific builds
- App Store Compliance: Ensures your app meets Apple's guidelines before public release
- Build Expiration: 90 day build expiry.
Perfect for
- Pre-production UAT with stakeholders and clients
- Gathering feedback before App Store submission
References
- Register AppID
- Get UDID
- Create Certificate signing request (CSR) certificate
- Register multiple devices
- Development Provisioning Profile
- Distribution Provisioning Profile
Troubleshooting
Common issues you may encounter include:
- Expired certificate or provisioning profile → Renew via Apple Developer portal.
- Untrusted developer message → Go to Settings → General → VPN & Device Management and trust the developer.
- App installation failed → Ensure your device UDID is added in the provisioning profile (for Ad Hoc builds).